How to Polish Existing Concrete Floors
Posted On August 29, 2025
Polished concrete floors can completely transform a space. They add shine, durability, and modern appeal to any home, office, or commercial setting. But polishing existing concrete is more than just grinding and buffing, it’s a careful process that combines preparation, the right tools, proper technique, and ongoing maintenance.
In this guide, we’ll break down everything you need to know to turn your worn concrete into a smooth, reflective masterpiece. We’ll also include practical tips, avoid common mistakes, and explain how One Awesome Concrete in Quail Bridge can handle the job professionally if you prefer expert help.
Why Polishing Concrete Matters
Polishing concrete isn’t just a cosmetic upgrade. It changes the way the floor behaves, performs, and feels. There are several reasons why homeowners and business owners invest in polished concrete:
Enhancing Durability
Polished concrete is significantly tougher than bare concrete. The grinding and polishing compress the surface, making it denser and more resistant to wear, scratches, and stains. This is especially useful in high-traffic areas such as kitchens, garages, or commercial spaces.
Imagine it like giving your floor a suit of armor, it withstands the daily grind without losing its shine. Additionally, polished floors resist moisture penetration, which helps prevent cracking and surface damage over time.
Boosting Aesthetic Appeal
A polished concrete floor looks clean, modern, and professional. It reflects light, giving your space a brighter, more open feel. You can achieve different levels of shine, from matte to high-gloss, depending on your personal style.
Polished concrete also allows for decorative touches like exposed aggregate or color dyes, adding character and uniqueness to your floor.This aesthetic versatility is why many designers prefer polished concrete for both residential and commercial spaces.
Reducing Maintenance Effort
One of the biggest advantages of polished concrete is how easy it is to maintain. Dust, dirt, and spills are easy to clean off, reducing the need for frequent deep cleaning or harsh chemicals. Sweeping and damp mopping are usually sufficient.
Polished concrete also doesn’t harbor allergens, making it a great option for people with sensitivities or pets. Over time, the ease of maintenance can save significant effort and cost.
Tools and Materials Needed
Before diving into polishing, gather the right tools. Using proper equipment ensures efficiency and a professional finish.
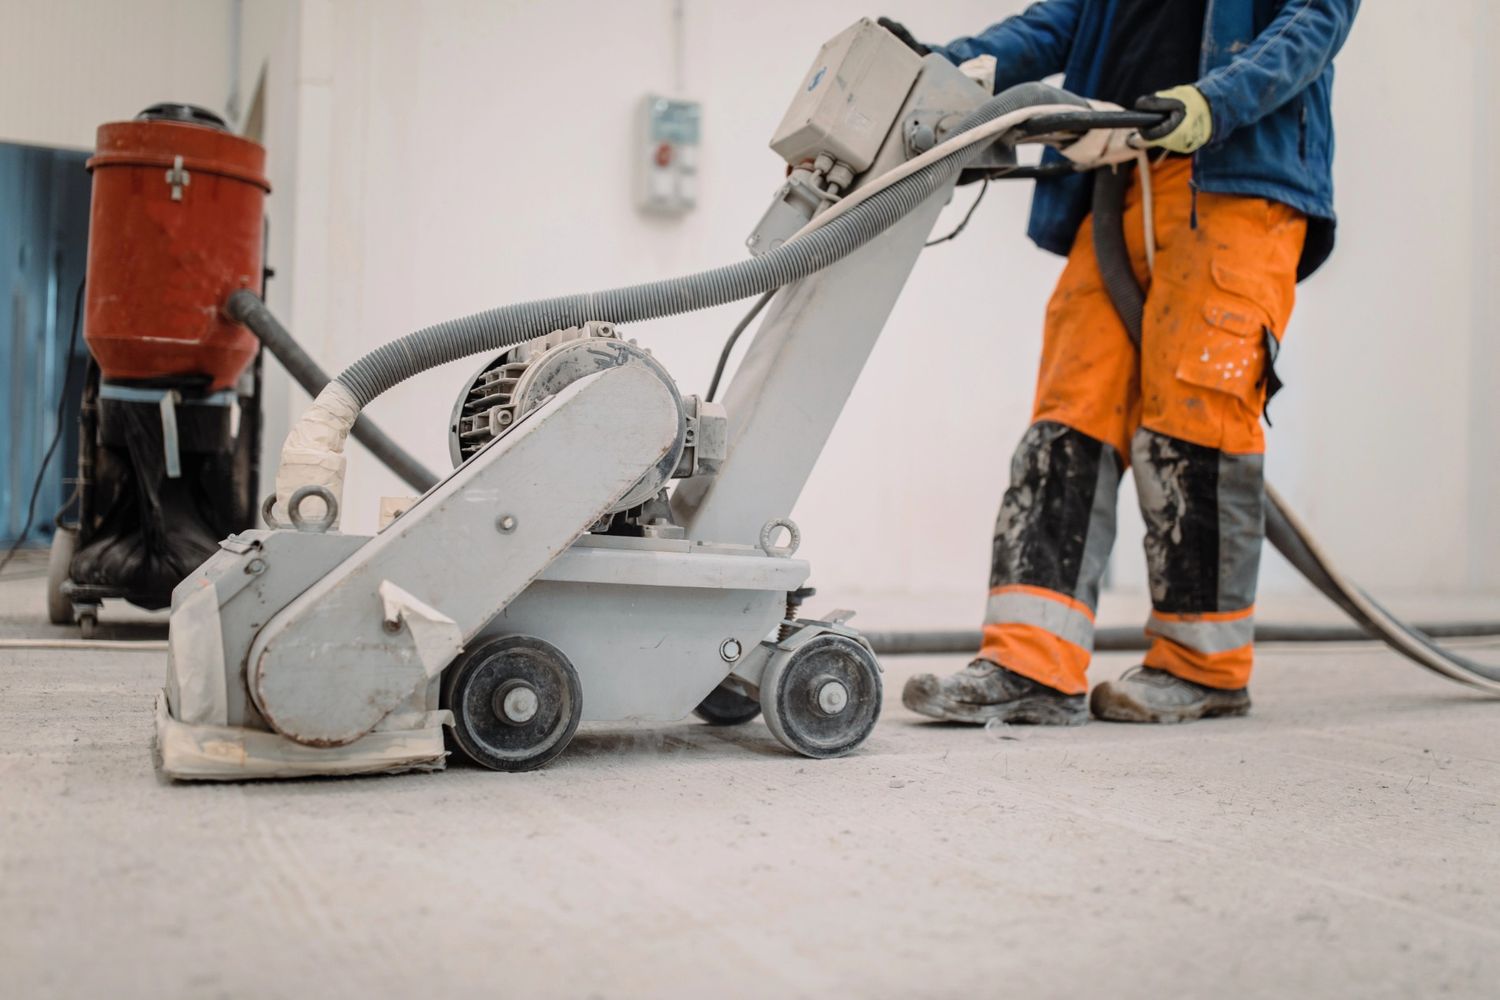
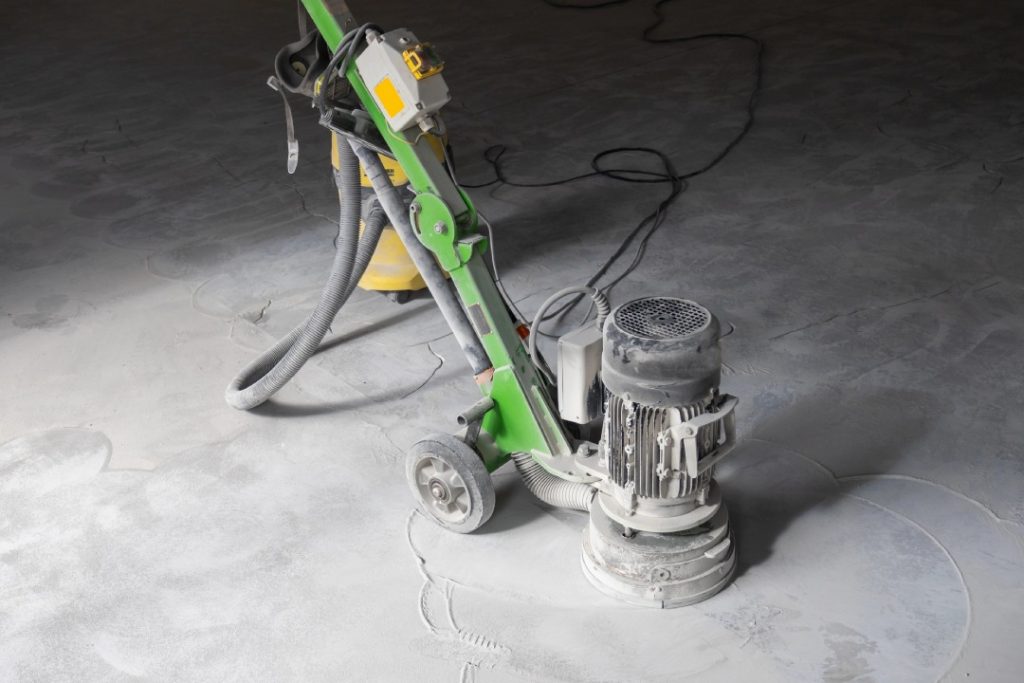
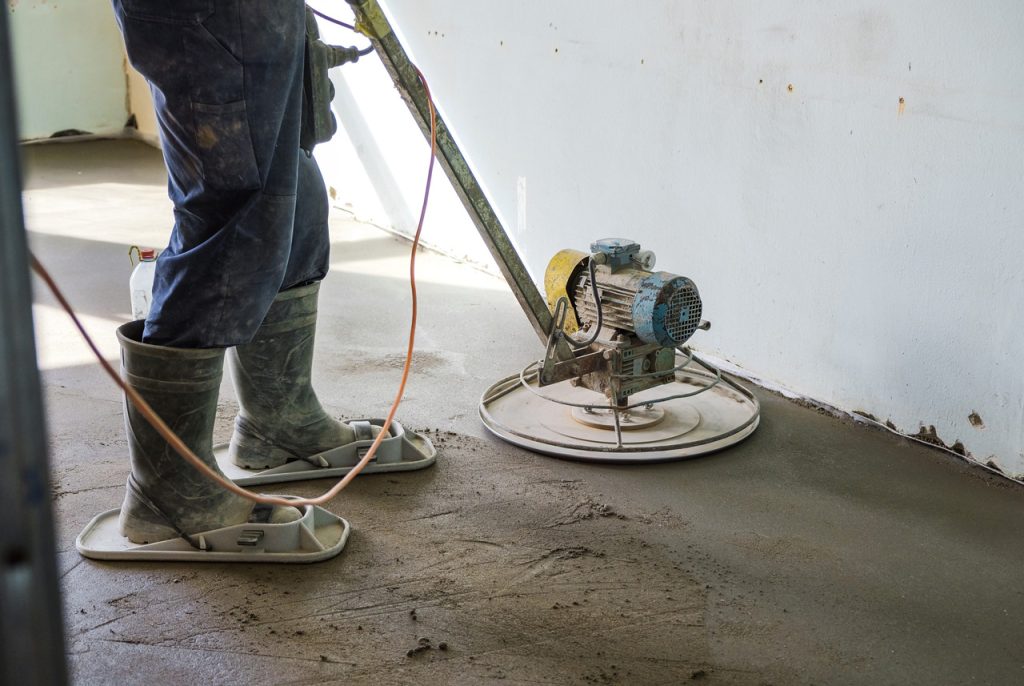
Concrete Grinder or Polisher
A high-quality concrete grinder or polisher is essential. For small DIY projects, a hand-held or walk-behind grinder can do the job. For larger areas, renting a professional-grade floor polisher is more efficient. Look for machines with variable speeds so you can control grinding pressure and achieve a smooth finish.
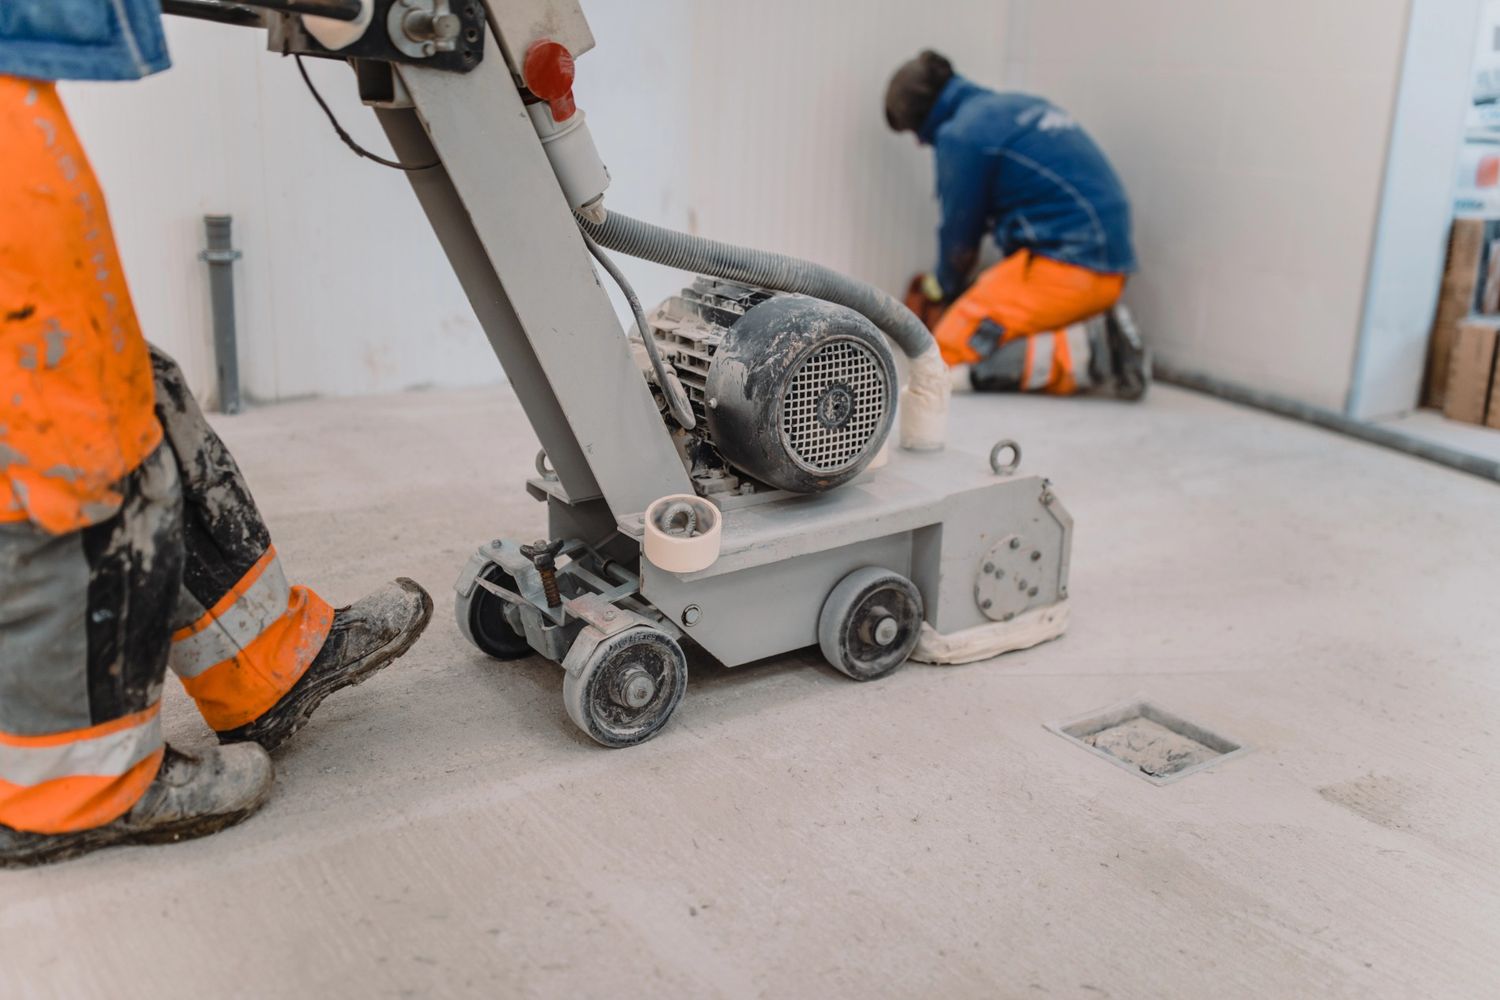
Diamond Grinding Pads
Diamond pads come in varying grits, from coarse to ultra-fine. Start with coarse pads to remove imperfections, adhesives, or old coatings, then gradually move to finer pads to create a smooth, shiny finish. Using the right sequence of pads ensures the floor looks even and polished, without scratches or dull spots.
Protective Gear
Concrete polishing creates dust, noise, and vibration. Protect yourself with safety glasses, ear protection, gloves, and a dust mask. If working in enclosed spaces, consider a respirator to prevent inhaling fine dust particles. Safety gear not only protects your health but also makes the job more comfortable and focused.
Cleaning Supplies
A broom, vacuum, mop, and mild cleaning detergents are necessary. Clean the floor before polishing to remove debris and after polishing to remove residue. Microfiber mops work best because they prevent scratches and help achieve a clear, reflective finish.
Preparing Your Concrete Floor
Proper preparation is the foundation of a polished floor. Neglecting this step can lead to uneven finishes or long-term damage.
Clearing the Area
Remove all furniture, rugs, equipment, and obstacles. A clutter-free workspace allows you to move freely and reduces the risk of accidents. It also ensures that you don’t accidentally scratch polished surfaces or damage tools.
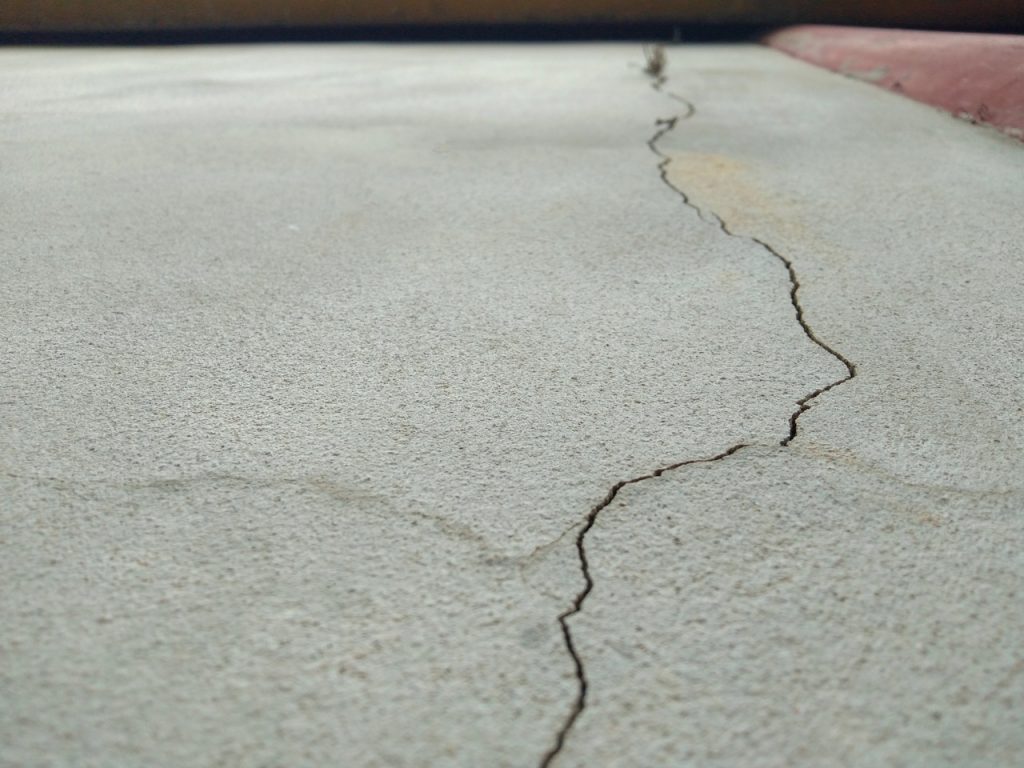
Repairing Cracks and Holes
Fill any cracks, holes, or uneven spots with a concrete patching compound. Polishing over damaged areas highlights flaws instead of hiding them. Pay attention to expansion joints and edges, as these areas often require extra care.
Removing Old Coatings
Old paint, sealers, or epoxy layers can prevent proper grinding and polish adhesion. Use a chemical stripper or a grinder to remove coatings. Ensuring a clean, bare surface allows the polishing process to work effectively, creating a uniform finish.
Step-by-Step Polishing Process
Now it’s time to transform your concrete. Polishing is a multi-stage process that gradually refines the surface.
Initial Grinding Stage
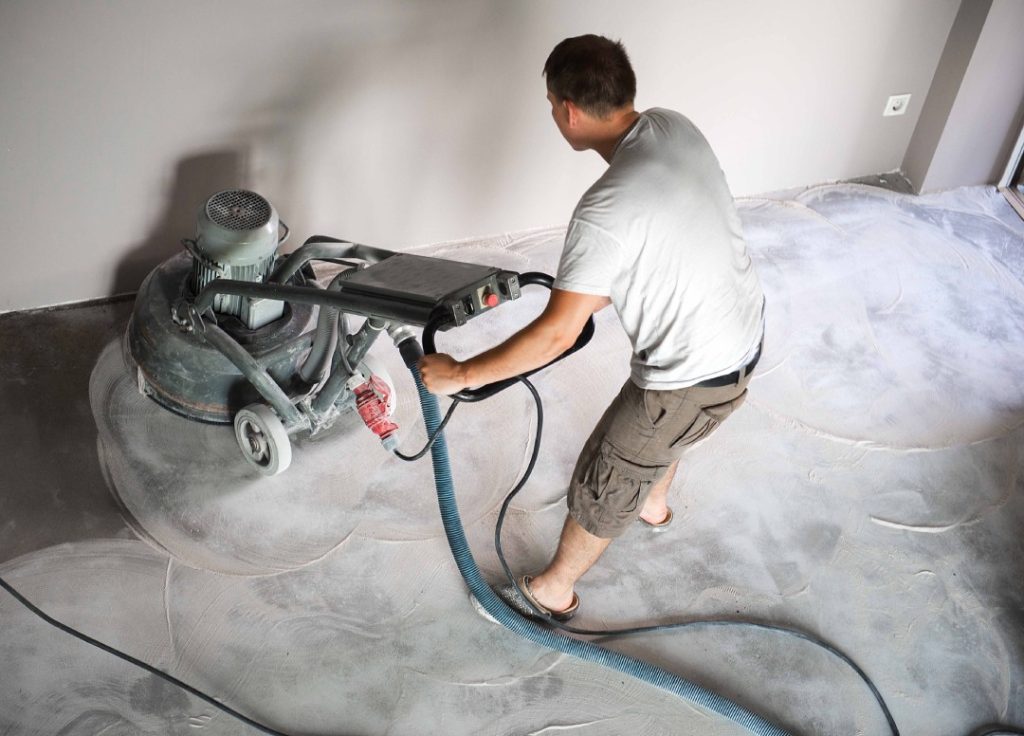
Coarse Grit Grinding
Start with coarse diamond pads (30-40 grit). This step removes surface imperfections, adhesive residues, and minor stains. Move the grinder in overlapping passes for consistent results. Take your time, rushing can leave uneven spots and scratches.
Edge Work
Use a smaller grinder or edging tool for corners, walls, and tight spaces. Neglecting edges leaves the floor looking incomplete. Consistent attention ensures a seamless, professional finish.
Medium Grit Grinding
Switch to medium grit pads (60-80) to smooth the scratches left by coarse grinding. This stage helps prepare the floor for finer polishing. Move methodically, checking the surface frequently for rough spots or uneven areas.
Fine Grit Grinding
Fine grit pads (150-300) further refine the surface. This stage removes small scratches, leaving the floor smooth and ready for the high-gloss finish. Walk slowly and carefully, ensuring you cover every inch evenly.
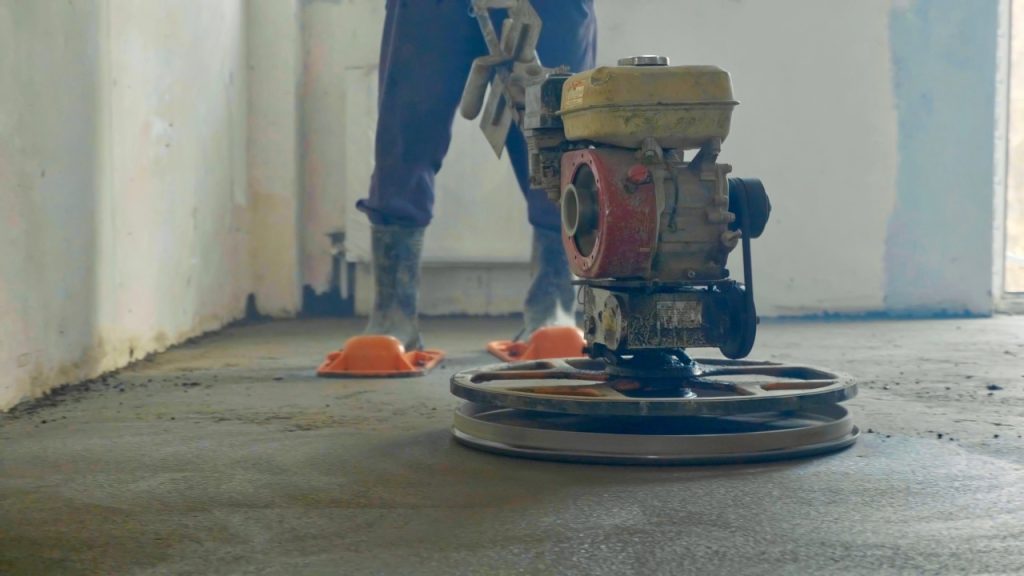
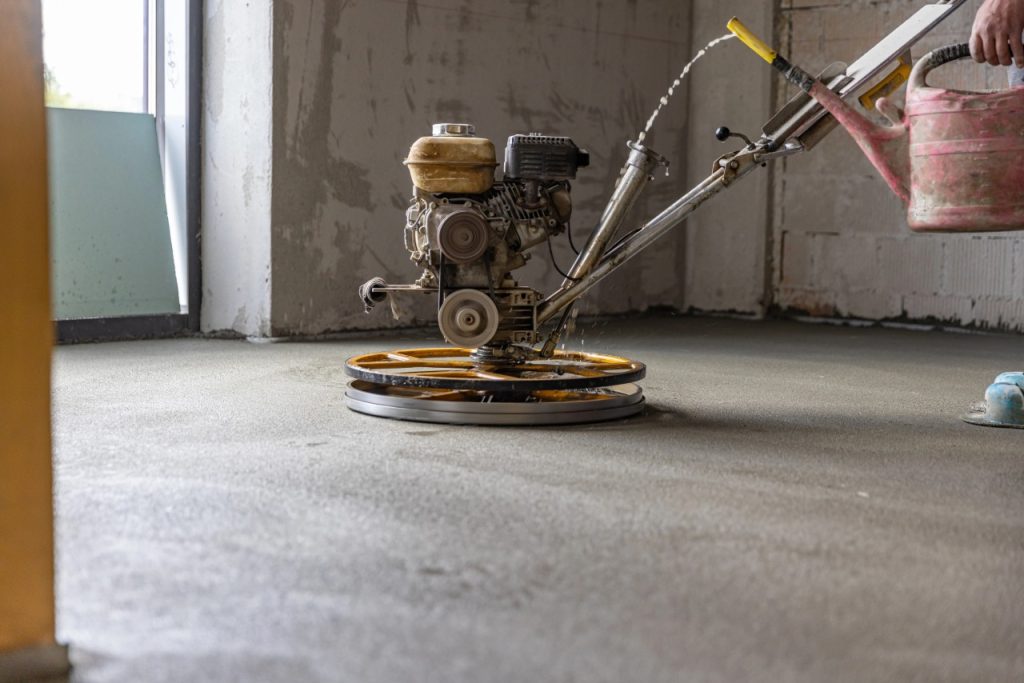
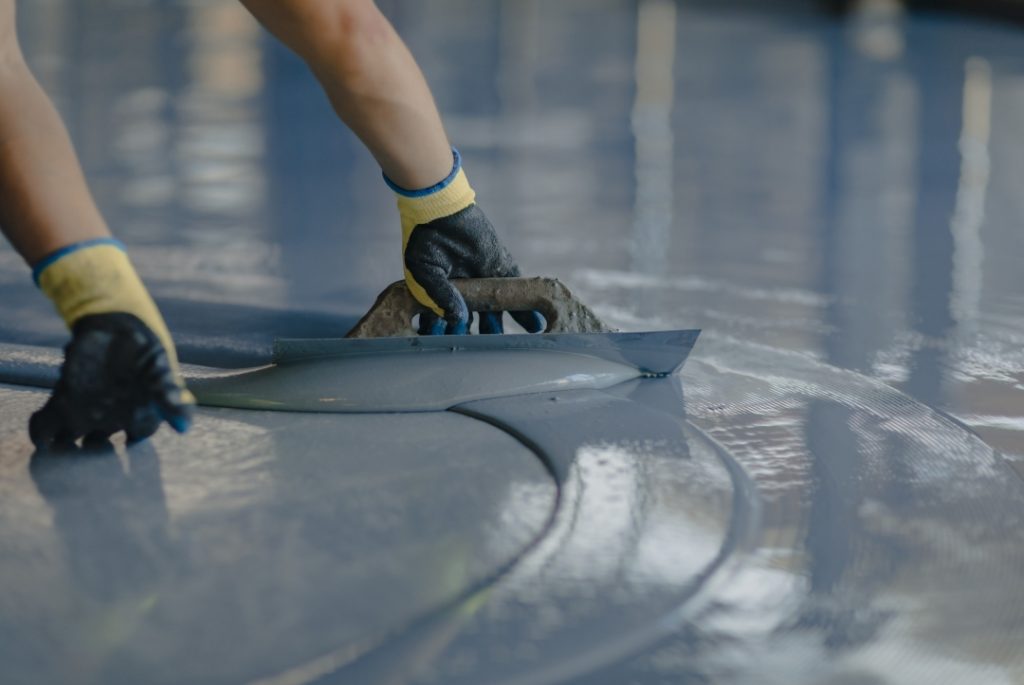
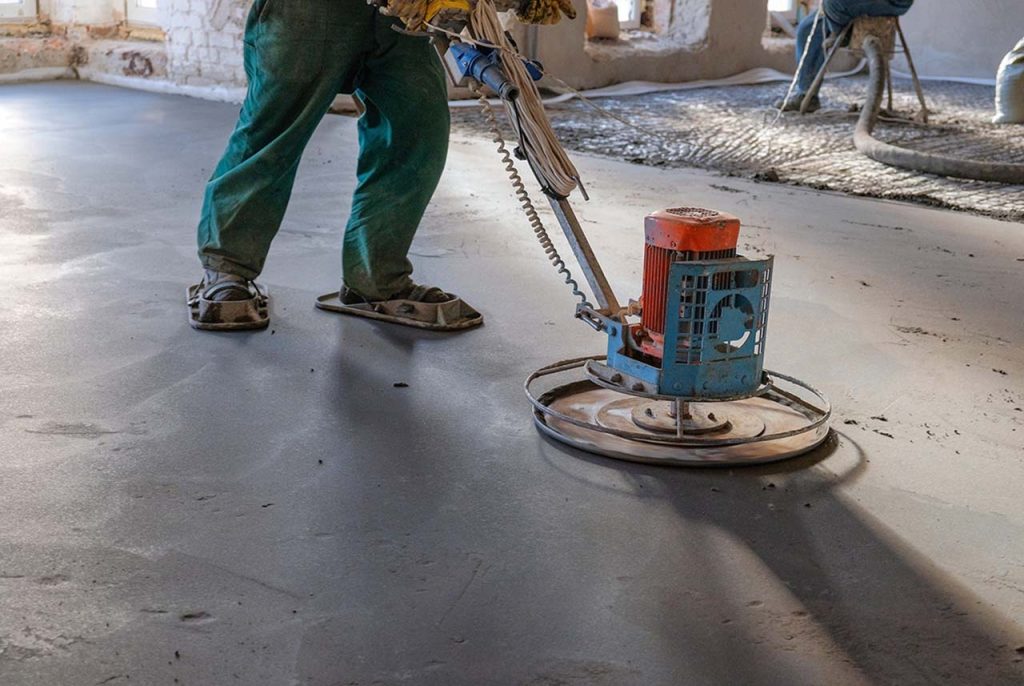
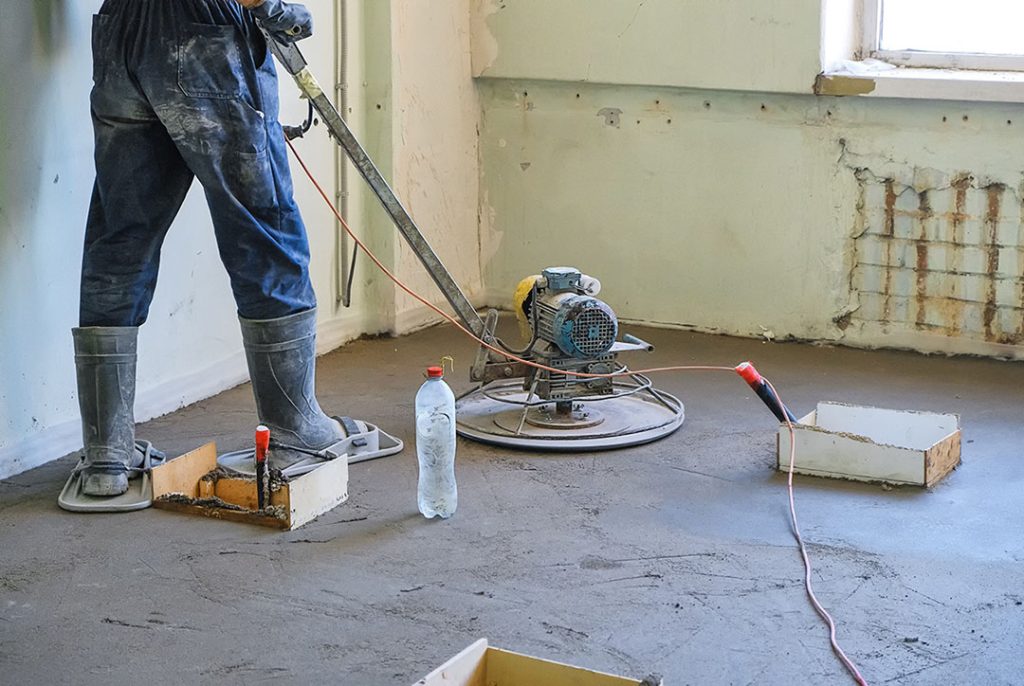
Polishing and Burnishing
Use high-grit pads (400-1500) for the final shine. Burnish with a high-speed buffer for a mirror-like effect. You can adjust the level of gloss to suit your taste. High-traffic areas may require extra passes for durability and shine.
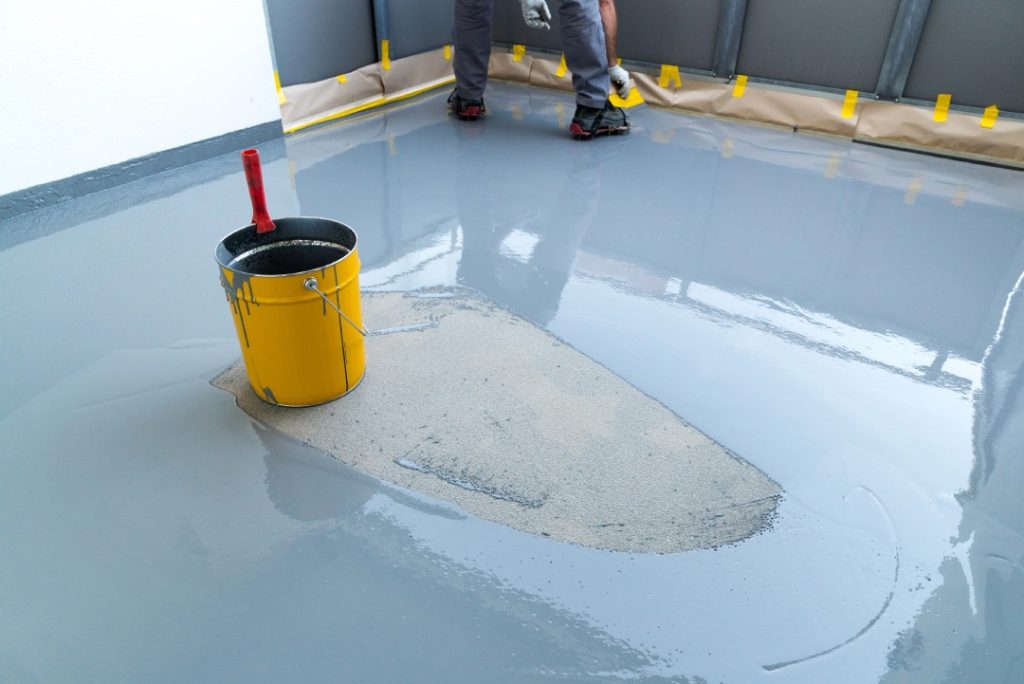
Sealing and Protecting the Surface
Polishing alone isn’t enough. Sealing protects the floor and ensures the finish lasts.
Choosing the Right Sealer
Penetrating sealers absorb into the concrete and protect it without changing the appearance. Topical sealers create a glossy finish and add extra surface protection. Select based on traffic levels, desired appearance, and maintenance preferences.
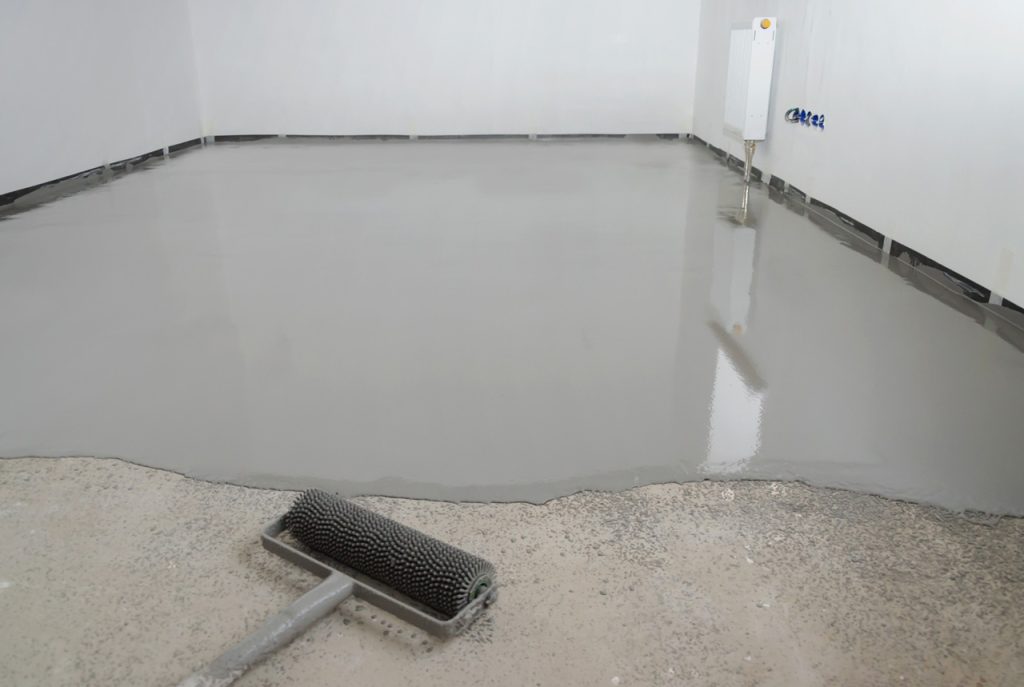
Application Techniques
Apply sealers evenly using a roller or sprayer. Multiple thin coats are better than one thick coat, which can bubble or streak. Let each coat dry fully before applying the next. Proper application maximizes protection and shine.
Common Mistakes to Avoid
Polishing concrete may seem straightforward, but certain mistakes can ruin the floor’s finish.
Skipping Repairs
Ignoring cracks, holes, or uneven areas leads to poor results. Always patch imperfections before polishing to achieve a flawless surface.
Overlooking Safety Gear
Concrete polishing generates dust, noise, and debris. Protective gear isn’t optional—it’s essential. Glasses, gloves, respirators, and ear protection keep you safe.
Rushing the Process
Each stage, from coarse grinding to final burnishing, requires patience. Skipping steps or moving too fast can leave scratches, dull areas, or uneven surfaces. Take your time for a professional finish.
Maintenance Tips for Polished Concrete
Maintaining polished concrete is easier than caring for other flooring types. A few simple steps keep the shine alive.
Regular Cleaning
Sweep and mop often to prevent dirt and debris from scratching the surface. Use mild cleaning solutions instead of harsh chemicals. Microfiber mops are ideal for maintaining gloss without damaging the floor.
Periodic Re-polishing
High-traffic areas may need touch-ups every few years. Re-polishing restores shine, removes minor scratches, and keeps the floor looking brand new. Consult a professional if unsure about timing or technique.
One Awesome Concrete: Polishing Experts in Quail Bridge
If DIY feels overwhelming, professionals like One Awesome Concrete in Quail Bridge can handle the work. They offer expert concrete polishing, from preparation to burnishing and sealing. Their experience guarantees smooth, durable, and reflective floors that last for years. Hiring experts saves time, ensures consistent quality, and minimizes errors.
One Awesome Concrete Serving the Quail Bridge Community and Beyond in Houston
One Awesome Concrete is dedicated to serving the diverse needs of the local community of Houston, including individuals residing in neighborhoods like Quail Bridge. With its convenient location near landmarks such as the St.Thomas CSI Church of Greater Houston and major intersections like Farm-To-Market Rd. 2234 & FM 521 Rd. (coordinates: 29.569360775535024, -95.46544194810907), we offer polished cement contractors Houston services.
Get Polished Cement Contractors Services at Quail Bridge Now
Contact Us
(832) 368-9257
Navigate from Quail Bridge to One Awesome Concrete Now
Transform Your Concrete Floors with Lasting Shine
Polishing existing concrete floors brings a combination of beauty, durability, and low-maintenance convenience.
With proper preparation, the right tools, careful technique, and protective sealing, your concrete can achieve a stunning glossy finish. Whether tackling a small DIY project or hiring experts like One Awesome Concrete in Quail Bridge, following these steps ensures your floors remain smooth, shiny, and long-lasting. Regular cleaning and occasional re-polishing will keep your concrete looking its best for years.
FAQs
Q1: How long does it take to polish a concrete floor?
The timeline depends on the floor’s size and condition. Small residential spaces may take one day, while larger commercial areas can take several days to complete properly.
Q2: Can I polish concrete myself?
Yes, with the right tools, grit pads, and patience, DIY polishing is possible. Larger or more complex projects benefit from professional expertise.
Q3: Do polished floors need sealing?
Sealing is recommended. It enhances shine, protects the floor from stains, and extends durability.
Q4: How often should polished concrete be maintained?
Regular cleaning is essential. High-traffic areas may require re-polishing every few years.
Q5: What grit should I start with on an old concrete floor?
Start with coarse grit, around 30-40, to remove imperfections. Gradually progress to medium and fine grits for a polished finish.


RELIABLE, TRUSTWORTHY, and AFFORDABLE PROFESSIONAL SERVICES
or Call us now at
(832) 368 – 9257
Recent Blogs
Can Refinished Cement Flooring Withstand Heavy Foot Traffic
When it comes to choosing flooring that lasts, one common question from property owners, business managers, and homeowners is whether refinished cement flooring can handle heavy foot traffic. With increasing popularity in both commercial and residential settings, cement floors are no longer seen as just utilitarian surfaces, they are stylish, durable, and highly customizable. But…How to Easily Repair Damaged Finished Concrete Flooring
Finished concrete flooring is known for its durability, clean appearance, and low maintenance. Whether you have polished concrete, stained concrete, sealed concrete, or epoxy-coated concrete floors, the surface can still experience damage over time. Cracks, chips, surface scratches, spalling, and discoloration are common issues in both residential and commercial spaces. This guide explains how to…How Contractors Ensure Smooth Polished Cement Finishes
Polished cement flooring is widely used in commercial buildings, retail stores, warehouses, healthcare facilities, restaurants, and modern residential properties. Property owners choose polished cement because it offers durability, low maintenance, high light reflectivity, and long service life. However, achieving a smooth polished cement finish requires more than running a grinder over a concrete slab. It…


EXPERT CONSULTATION, SWIFT QUOTATIONS
Ready to bring your concrete vision to life? Reach out to One Awesome Concrete Polishing & Staining today for expert consultations and fast, accurate quotations. Our team of professionals is dedicated to providing personalized guidance and precise estimates, ensuring that your project is executed to perfection. Whether you’re looking to enhance your home, renovate a commercial space, or overhaul an industrial facility, we have the experience and tools to handle projects of all sizes. Contact us today, and let’s work together to transform your space with the beauty and durability of cement polishing company Houston. Experience top-tier service and exceptional results with One Awesome Concrete Polishing & Staining.


